Saturday, April 29, 2017

Lemon Tart For The Win!

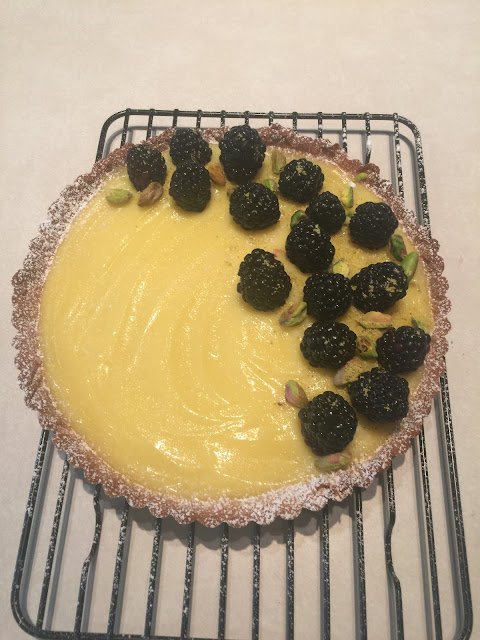
So all of the little things that I made this week have added up to this moment. I knew all I had to do was add my Lemon Curd that I made earlier in the week to my pastry shell that I made two days ago and I would have a beautiful lemon tart that my family can eat with their Sunday dinner. It literally takes minutes when you have all the components of the tart already made. So today all I had to do was assemble and decorate. Oh and Kroger had blackberries on sale for $1.50 so that was going to be the berry that I chose to use as a garnish. Oh and pistachios, I just have a ton of shelled pistachios in my pantry for future Mother's Day bakes. Well, here is the tart, I dusted the top with powdered sugar (what lemon tart doesn't have a dusting of powdered sugar?) and with a little pistachio dust. I think it came out beautiful, I'll maybe update this post later with a picture of a slice. I'm still debating topping this with a dollop of toasted meringue or whipping up a little homemade whipped cream for the center.

Lemon Tart
Beautiful Lemon Tart with blackberries and pistachios

So here's what you will need

Lemon Tart

  • 1 9 inch pastry shell 
  • 1 1/2 cups Lemon Curd (Recipe here)
  • Blackberries for garnish

Pastry Shell (makes enough for 9 inch pan)

  • 1¼ cups all-purpose flour
  • ½ cup  powdered sugar (or ¼ cup granulated sugar)
  • ¼ teaspoon salt
  • ½ cup (1 stick) cold butter, cut into small cubes
  • 1 large egg
  • ½ teaspoon vanilla extract (optional)

yeah I have a notebook with baking and decorating ideas


First for the pastry shell, add flour, sugar, and salt in a food processor for a few seconds and pulse until combined. If you don’t have a food processor, you can do this by using a pastry cutter. 


Add butter and pulse until mixture becomes crumbly and resembles coarse meal, about 15 pulses.


Add egg and vanilla extract and keep pulsing until the dough is no longer dry and starts to clump together, about 10-15 seconds. Do not process to the point that a large ball of dough is formed; rather the dough should be quite crumbly with large clumps. Another way to check if it’s done is to take a piece of dough and press it between your thumbs – the dough should stick without feeling dry or crumbly.


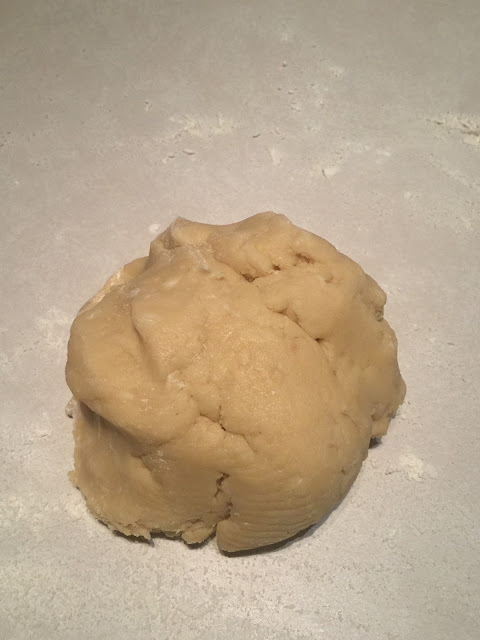
Turn dough to a lightly floured surface and form into a ball. It should come together easily without being sticky. Flatten ball slightly with your hands to form a thick disc. Wrap with plastic wrap and refrigerate for at least 1 hour. I made this dough two days before and just placed it in the fridge for 2 days.


It's easier if you keep dough in the shape that you want your final product to be.

All ready for the fridge

*If you don’t want to use the dough right away, you can refrigerate it for up to 3 days, or freeze it for up to a month and then thaw overnight in the fridge.


Now take your dough out of the fridge and let it sit on the counter for a few minutes to soften slightly for easy rolling. On a lightly floured surface, roll the dough out into an 11-inch circle, then place gently into a 9-inch tart pan (preferably with a removable bottom)


With a sharp knife, trim the edges of the pastry to fit the tart pan.
* Cover pan with plastic wrap and place in the freezer until firm, about 30 minutes. Frozen dough is less prone to shrinking while baking.(I don't care about shrinkage, but if you do this will help)

Preheat oven to 375F and place oven rack in the center.

Press parchment paper or aluminum foil tightly against the crust, covering the edges to prevent them from burning. Fill with pie weights/dried beans/uncooked rice, making sure they’re fully distributed over the entire surface.


Bake crust for 20 minutes, until foil no longer sticks to the dough. Transfer crust to a wire rack and remove weights and foil.

Bake for about 7-10 minutes longer until golden brown and dry. Transfer to a wire rack and let cool completely.

Now add in your Lemon Curd and with a offset spatula or butter knife just smooth out the surface

Lemon Tart
You can definitely eat this now

I then placed the tart back in the fridge overnight, and then decorate however you like.

I added a dusting of powdered sugar and fresh blackberries to one side. I also sprinkled pistachios and pistachio dust on one side of the tart. It is a very Springtime dessert, and I think people who enjoy slightly tart things will enjoy this tart. I am a huge fan of anything lemon so it works for me. 
Lemon Tart
Springtime fresh

Lemon Tart
Time to impress your friends with this Lemon Tart

Deliciously tart & sweet

Cookies & Cream Macarons For The Win!

Hmmmm I've been making a ton of curds lately (see those previous posts) and I've been collecting those precious egg whites to make something delicious. I'm sure I could have used them to make something else, but instead I decided to make more macarons. I don't know if you guys know this but macarons are hard to make, and if you are a beginner you know that you will have some major fails. I'm not claiming to be an expert on making macarons, but when you make a batch of macarons and they come out beautiful, and tasty you want to make them again. It's like when you play a video game and you keep failing a level, but in your mind, you think to yourself, I'm going to stay up all night and beat this level. That's how I feel with macarons. It's so dangerous to be so determined to bake macarons (almond flour is not cheap!) but when I think of all the cool flavor combinations that I want to try, and when I think of the people who will eat my macarons, I am more determined to make perfect macarons. That being said, I had the egg whites, so I decided to make cookies & cream macarons with an Oreo buttercream. I would say these were a success.

Oreo Macarons
Yummy Cookies & Cream Macarons
I left the macaron shells white because I liked the contrast with the dark almost black Oreo cookie crumbs. I couldn't resist letting these mature in the fridge for 24 hours, so I tried one, and they definitely taste like an Oreo. The macaron definitely has the usual texture of a macaron, crunchy exterior with a slightly chewy interior. The dusting of the Oreo crumbs on top adds another layer of chocolate flavor and the filling basically taste like you are eating an Oreo and I kind of like how the buttercream has that grey color. These macarons are both stylish and whimsical at the same time (not all macarons have to be neon, bright colors and not all macarons have to have a sophisticated flavor profile). I think if you make these macarons everyone will love them. So lets get started. Here's an important bit of information, I don't have exact measurements for the Oreo part. I literally separated a whole bag of Oreo Minis (the cream from the Oreo cookies). I had leftover cookie crumbs so I just placed them in a ziploc bag and set them in the pantry for later use. I did take pictures though so you can be the judge on how many cookies you need to crush.

Let's begin

Cookies & Cream Macaron Shells

  • 150g of powdered sugar
  • 150g of almond flour/meal
  • 150g of granulated sugar
  • 50g of water
  • 120 g of room temperature egg whites separated into two bowls (60g each)
  • 35 g of granulated sugar
  • crushed Oreo cookies for decoration
Oreo buttercream filling
  • 1 stick of butter
  • 2 cups of powdered sugar
  • 2-3 tablespoons of milk (help with consistency)
  • crushed Oreo cookies
  • cream from Oreo cookies


Ok for the macarons

First take your powdered sugar+almond meal and run that through a fine mesh sieve. Then take a whisk and mix all the ingredients after they have been sifted, then just set aside.

Sifting is so important if you want smooth macarons


Take 60g of your room temperature egg whites and fold it into your dry ingredients. This is going to form a thick almond paste, after folding just set the almond mixture aside.


Now take your other 60g of egg whites and place them in your stand mixer on medium until they start to get foamy.


When your egg whites get foamy add in the 35g of granulated sugar slowly and mix on medium to high speed until soft peaks form.

when you achieve soft peaks turn down the speed of your mixer and keep your egg whites beating on low speed (like 1-2 speed)

Now take your 150g of granulated sugar and 50g of water  and place it in a saucepan on your stove on medium heat. 


Let this boil until the temperature on your thermometer hits 240F (soft ball on candy thermometer)

Carefully take your sugar syrup and pour it down the side of your stand mixer ( in a slow steady stream) while the egg whites are whipping.

be careful the sugar syrup is hot

Continue whipping this mixture on high speed until your bowl cools down and stiff peaks form so about 10-15 minutes you should have a very glossy, shiny merengue, flip the bowl over and it shouldn't move.

Italian meringue

Now take 1/3rd of the egg whites and fold it into your almond paste


I like how white the macaron batter turned out

Now once your 1/3 meringue  and almond paste combine you can add all of the meringue and continue folding.

You will know when your mixture is done when it ribbons off of your spatula in a continuous motion.

Batter should flow like lava or ribbon off spatula

Take your macaron batter and place in a large piping bag with a round tip attached.

On a parchment lined tray pipe out 1.5 inch circles, tap your tray on the counter top once finished piping. I then placed Oreo Crumbs on some shells for garnish so they would remind me of my favorite cookie. I really think the color contrast looks amazing.


Resting, waiting to be baked


Preheat your oven to 300F

Let them sit on your counter to create a skin (I like to let them rest at least 30 minutes, normally an hour as I clean up the kitchen) You will know they are ready when you touch the macaron shell and nothing sticks to your finger. The macaron will also turn a flat matte finish.

Place your macarons in the 300F oven for 14-16 minutes (I rotate the tray at the 7 minute mark)

I then take them out of the oven and off of the baking tray and place them on the counter top still on the parchment paper to cool 

oreo macarons
Cooling off on the countertop


Pretty macaron shells out of the oven

After a few minutes I like to match up the macaron shells of similar size and get them ready to be filled with the Oreo buttercream.

Ok now for the Oreo buttercream

First in a bowl cream one stick of butter for around 5 minutes 


Creamed butter

Add in your two cups of powdered sugar

Sorry for such a bad picture but you get the idea

Next add in the cream from the inside of your Oreo cookies

This was all of the cream filling from a whole bag of Mini Oreos

Mix that all together ( you may add 2-3 tablespoons of milk to get a smooth consistency)

Lastly add in your crushed Oreo cookies

I didn't use this whole bowl of crushed cookies
Give it one final mix then place buttercream in a piping bag.


This recipe makes a lot of buttercream just put the leftovers in the freezer

Ok all you need to do now is fill your macarons and sandwich them together


Oreo Macaron
Delicious, will definitely make these again


Oreo macaron
Not hollow on the inside
They turned out great and of course they taste amazing. I placed all of these in the fridge to mature and will be enjoying them in the next couple of days.

Wednesday, April 26, 2017

Lemon Curd For The Win!

This weekend I plan on making my favorite dessert of all time, a luscious lemon tart. I've always loved all things citrus.  As you can see from the recipes so far on this blog, I've been on curd kick. I've made grapefruit curd, mango curd, and now lemon curd. I love their tartness with a hint of sweetness. I love how citrus literally brightens your day. I didn't want to get stressed by making everything in one day so I decided to make the filling today. I will make the pastry tomorrow, and then bake and assemble later this weekend. I'm also in the process of braiding my hair so I know I wouldn't have time to do it all in one day. As far as the curd, it really is simple to make and you can use it to fill macarons, cakes, pies, top ice cream , or just on toast in the morning. It's also a great way to use lemons.

Lemon Curd
This is enough to fill a 9 inch tart shell
Like all curds you just need a few basic things.

Lemon Curd
  • 2 large eggs
  • 2 egg yolks (save the egg whites for macarons later, maybe)
  • 3/4 cup granulated sugar
  • 1 tablespoon lemon zest
  • ½ cup freshly squeezed lemon juice (2-3 lemons for both zest and juice)
  • 2 tablespoons heavy cream (optional)
  • ½ cup  unsalted butter, cut into small pieces (1 stick)


First, in a medium heatproof bowl, place eggs, sugar, lemon zest, lemon juice, and heavy cream and whisk to combine.


 Place the bowl over a saucepan of simmering water . Cook on moderate heat, whisking constantly, until mixture becomes thick (mine was ready in 8minutes, but it can take up to 15). If you have a thermometer, it should register 170F/75C; otherwise, it should coat the back of a wooden spoon and leave a clear pass if you run your finger through it. 


The curd will thicken more once cooled.

Remove from heat and immediately strain mixture through a sieve.


Look at all that chunky stuff, after straining you are left with a smooth curd


 Now add in your butter, a few cubes at a time, and whisk until completely melted and incorporated, and your  mixture is smooth. 


Take your time with it—the whisking makes for an airy and light texture. Allow to cool to room temperature before placing in your fridge (lemon curd can be kept in an airtight container in the fridge for up to a week, or can be frozen for up to 2 months. To thaw, place overnight in the fridge.

It's so smooth


Whisk the mixture to smoothen it before using.

Lemon Curd
Yummy Lemon Curd

Now all you need is crust, which I will be making a yummy pastry dough in the next coming days.