Friday, March 31, 2017

Mint Chocolate Macarons For The Win!

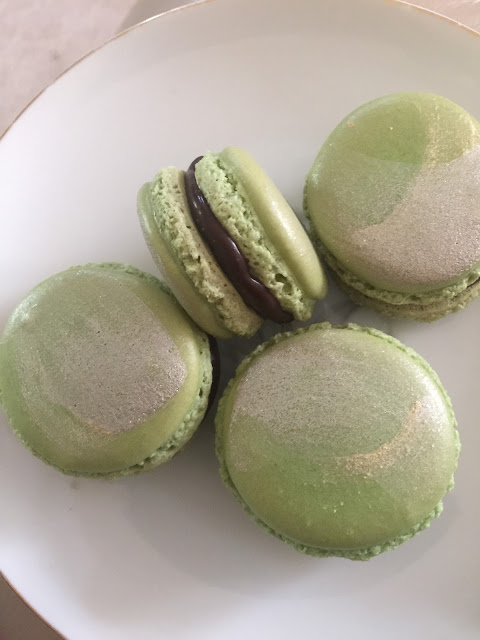
When your little sister asks you to bake something, you bake it. She wanted something chocolatey and I happened to have some dark chocolate lying around. I also had mint extract from baking over the holidays. That's where this recipe came about, yummy macarons with a mint chocolate ganache. I also wanted to play around with some gold and silver dust that I bought. I ended up painting on the baked shells and I think they turned out beautiful, and delicious. As far as pictures, you should refer to the past macaron recipes I've posted. I only really took pictures of the ganache process and the finished cookies.

mint chocolate macaron
Mint Chocolate Macarons

Here's what you will need

Macaron Shell
  • 60g of almond meal
  • 110g of powdered sugar
  • 60g of room temperature egg whites
  • 40g of granulated sugar
Mint Chocolate Ganache
  • 1 cup dark chocolate or milk chocolate
  • 1 cup of heavy cream
  • 1/2 teaspoon of mint extract (you can adjust this if you want it more minty)

First you need to sift the almond meal and powdered sugar together in a large bowl and set aside

Take your room temperature egg whites and beat them on a low speed until they become white and frothy (about 2 minutes)

Turn up your speed to medium for 2 minutes. Your egg whites will start to form soft peaks, gradually add in your granulated sugar.

Turn your speed up to high for 2 minutes and beat your eggs until stiff peaks form. This is also a great time to add any gel food coloring. Since these are for the mint chocolate macarons I added about 2 drops of mint green + 1 drop of a forest green. Stop mixing once stiff peaks form.

Now add in your dry ingredients and carefully fold ingredients together (about 50 folds if you are counting) stop when you reach a lava like consistency or when it ribbons off of your spatula


Place your mixture in a piping bag and pipe out 1.5 inch circles on a parchment lined baking sheet.

Preheat your oven to 300F.

Bang your tray against the counter to release those hidden air bubbles and let these macarons dry on the counter for about 30 minutes. Gently tap the side of a macaron to see if a shell has formed, they are ready to go in the oven when they are dry to the touch.

While you are waiting for those to dry lets make the filling.

Place your cup of heavy cream in a saucepan set to medium heat. When your cream is coming to a boil take it off of the heat and pour it over your chocolate.


Let that sit for a minute, then give it a stir. Now add the 1/2 teaspoon of mint extract and stir again. Give this a taste and see if it's as minty as you would like. I always start small with minty extracts because too much and it will taste like mouthwash. Let your ganache sit on your counter to cool down. It will thicken up. This is where I put it in a piping bag and place a rubber band around the top of the piping bag and place the whole thing in the freezer to firm up faster. You can also make this ganache earlier in the day or a few days before.

Now bake those macarons on 300F for about 16 minutes. Everyone's oven is different so just keep an eye on them, when they start to peel off of the parchment paper they are done. I then leave them on the hot baking tray for 1 minute and then slide the macarons on the counter, still attached to the parchment paper, for about 2-3 more minutes.


This is where I painted the tops with a brush dipped in a mixture or gold+silver luster dust that had been mixed with almond extract (the only clear high alcohol content that I had) They turned out wonderful. I then let them sit out to dry completely for about 15 minutes.

Now take out your ganache, make sure it's not frozen. If it is leave it on the counter or massage with your warm hands. Pipe the chocolate on one side of the macaron and sandwich another macaron on top. Voilá you have a mint chocolate macaron. I then place all my assembled macarons on a tray and place in the fridge for 24-48 hours then let them come up to room temperature. They taste so much better then.


mint chocolate macaron

Almond Zucchini Bread For The Win


You know when you just randomly have two zucchinis in your fridge and you don't know what to do with them. You think to yourself, what am I going to do with just two zucchinis? The answer should always be make zucchini bread. Zucchini is just a vegetable I've never really liked. My Grandma and Mother would always sauté these with yellow squash and onions, gross! As an adult, I normally just thinly slice zucchini and add it in my lasagna. The taste is masked in the lasagna. Oh, and I just bought these cute little white ceramic loaf pans so I knew I was going to make some little loafs. When I was baking this I realized I was out of vanilla extract. I did have almond extract and almond slivers, thats why this turned out to be almond zucchini bread. Overall the flavors mixed well together. If you are trying this recipe and have never had zucchini bread, just think of the texture being like a banana bread. As far as the zucchini in the bread, it doesn't take like a random vegetable bread, think carrot cake, you don't actually taste carrots. I think the bread tasted amazing, and everyone loved it. Little loaves make great gifts and people love things they can eat. Check out how cute they look.

almond zucchini bread
Fresh baked zucchini bread


So here's what you will need

Almond Zucchini Bread

  • 3 cups of all purpose flour
  • 3 eggs
  • 2 grated zucchinis
  • 1 teaspoon of baking powder
  • 1 teaspoon of baking soda
  • 1 teaspoon of salt
  • 1 tablespoon of cinnamon
  • 1 teaspoon of nutmeg
  • 1 teaspoon of allspice
  • 2 1/4 cups granulated sugar
  • 3 teaspoons of almond extract
  • 1 cup vegetable oil
  • 1/2 cup slivered almonds (optional)

First grate those two zucchinis and place the grated zucchinis in a bowl, then just set that aside

Shred that zucchini


Grease and flour, or spray with cooking spray two 8 x 4 inch pans. Preheat your oven to 325F. I used 4 mini loaf pans and this recipe filled them so I would say this recipe will make 2 loaves or four mini loaves. You can also buy those little aluminum disposable loaf pans too. 
Sift flour, salt, baking powder, baking soda, cinnamon, allspice, and nutmeg together in a bowl. Give your dry ingredients a little stir to just make sure everything is sifted together.

  1. Now beat your eggs, oil, almond extract, and sugar together in a large bowl.


  2.  Add your sifted dry ingredients to the creamed mixture, and beat well.


  1. Your mixture will be very thick and dry, so switch to a wooden spoon, or spatula and mix till you don't see any dry remnants. ( to me it will look like a cookie dough). This dough will loosen up when you add in the zucchini. 

  2. Hey before you put the zucchini in your dough, give it a little squeeze in your hand. Look at how much liquid was left in the bowl.


  3. Stir in zucchini and nuts until well combined. 

  4. Pour batter into prepared pans. *****don't fill your pans up all the way, just go for about 2/3 full****

  5. Bake for 40 to 60 minutes, or until tester inserted in the center comes out clean. Cool in pan on rack for 20 minutes. 

  6. Remove bread from pan, and completely cool.


So now you are done, the bread is amazing for breakfast, an afternoon snack, or dessert. I just dusted the top with powdered sugar because I think it makes things look pretty and also adds a little extra sweetness. Oh also don't forget you can add whatever you want in here, different nuts, chocolate chips. Go crazy guys.


Wednesday, March 22, 2017

Doughnuts For The Win!

So I decided to make some homemade doughnuts, well Nisha wanted doughnuts. I've never made them so I felt like this was a challenge that I was up for. I mean who makes their own doughnuts nowadays. I also thought it would be something cool for other people to make, and doughnuts are so customizable. Here's how they turned out.


Look at this pink glazed doughnut with cute sprinkles. I'm calling this one the Homer J. An homage to Homer Simpson.


I'm calling this one Joy the world, you know the world would be crappy if there were no almond joys. As you can see this doughnut is chocolate glazed with coconut and almond slivers. Yumz

This one is for Nisha, it's just as you can see, chocolate glazed with a ton of sprinkles, I literally used every sprinkle I had. She's special to me, don't tell her that

Lastly I'm calling this one the Glenn Glenn for my dad. He likes Key lime anything, so this one is a chocolate dipped long doughnut topped with graham cracker crumbs, and toasted coconut. Then stuffed with a Key lime curd. Amazing

I think doughnuts are cool and if you want to try this recipe you can totally customize these, and you probably have all the ingredients in your home already. Well you probably don't have the yeast but you can buy this anywhere for about 99 cents.

Here's what you will need


Doughnut Dough

  • 2 cups all purpose flour
  • 3/4 cup of milk
  • 1/4 cup of granulated sugar
  • 1 1/2 teaspoon of instant dry yeast
  • 1/4 teaspoon of salt
  • 2 eggs 
  • 1/2 cup of butter (1 stick)
Additional items
  • 1 large greased bowl (use like vegetable oil or cooking spray)
  • small pot or saucepan
  • wooden spoon or spatula

First you need to pour your milk in a saucepan with one stick of butter and place it on your stove top. I had the temperature on medium to high heat. Just stand there it took a few minutes, you don't want this to boil or simmer, just melt together.


When your butter and milk combine together take it off the heat and let cool for a few minutes.


While that is cooling for a few minutes, now is a good time to separate those eggs. You only need the egg yolks for this recipe. You can save those egg whites for something else, I honestly put mine in a glass bowl and placed them in the back of my fridge for macarons.

Ok, now in a large bowl place your flour, yeast, sugar, and salt together


Now mix the buttery milk and the yolks into your flour mixture. This will make a very wet dough, almost a batter. ( I took a pic before I added the yolks, I was zoning out)


So I just added the egg yolks after this stage and yeah, back on track

This is the fun part, hahaha I like playing in food. Hold the bowl steady with one hand and then with your free hand, grab the dough and pull up as much dough as you can then let it go. Keep doing that for about 5 minutes. Your hands will get dirty, but it's so fun. Your dough will be liquid or loose at first, it's going to firm up a little and become stretchy.


Ok now oil a second large bowl and place your dough in it. You need to spray some plastic wrap with cooking spray and place that on top of the bowl. Then chill this for at least 4 hours or until it is firm. I think it's better to chill overnight, thats why I make the dough the night before. BTW, this dough won't double in size like bread dough usually does.

You also might want to prep two large baking trays, just line them with parchment paper.

Now put flour on your counter and turn the dough out of the bowl onto your counter. You can cut your dough in half, and place that half in the fridge to stay cold. It's time to make some doughnut shapes.

I basically just rolled this dough out to about 1/2 inch thick and used a large circle cookie cutter and stamped out these circles, then used the smallest cookie cutter I had and cut out the middle. 


Hey if you don't have cookie cutters then don't get sad, you can still make cute doughnuts. Roll your dough out into a 9in x 5 in rectangle and cut 1 inch strips across. Then just pinch the ends of 2 pieces together, then twist into a rope. Then just pinch the other end together. This will make a cute long doughnut. 

You can also take the twisted rope doughnuts and pinch the ends together and make a circular twist, it's up to you.


Ok, you are done shaping your doughnut babies. Just lift them up and place them on your baking sheets that are lined with parchment paper. Use two trays because this will give the dough plenty or room to rise. Cover these loosely with a dish towel or oiled plastic wrap. Leave these in a warm place to proof for about 30 minutes to 1 hour. 

When you see the dough is growing nicely you can go ahead and preheat the oven to 375F.

So your dough is ready to bake when it has grown by about 75%. If you push the side of one doughnut and your finger leaves and indent, it's ready. 

Bake in your 375F oven for about 10-12 minutes, or until they are dark golden brown. 

Here's what you need for the glaze


Doughnut glaze
  • 1 2/3 cups powdered sugar
  • 5 tablespoons of milk
  • 1 teaspoon of vanilla extract
  • pink gel food coloring (optional)
  • 2 tablespoon cocoa powder (optional for chocolate glaze)
  • sprinkles
To make the glaze, sift the powdered sugar into a bowl. then gradually mix in the milk and vanilla extract. Mix until smooth and fairly runny. Now you can add in your pink food coloring.

If you are making the chocolate glaze just sift in the cocoa powder and powdered sugar together, then add the milk and mix until smooth

Spoon icing over doughnuts or dip doughnuts in the icing. Decorate how you please.


Eat these doughnuts the day they are made.

Don't they look amazing, serve them with milk, of coffee. Yay for Doughnuts!

Sunday, March 19, 2017

Macarons for the win!

So I haven't posted in about 5 days, well thats because my birthday was this weekend so yeah I didn't feel like baking. The great thing about birthdays are the money. Hahahaha I mean I could have bought a ton of things for myself, but instead I bought new ramekins, mini ceramic loaf pans, tons of sprinkles, luster dust, spatulas, new baking pans, sheets, cookie cutters, you get it. I just bought things to help me bake more delicious treats. I think I'm going to try to bake things and upload them with themes. For example, next month for April I will bake only breads or things that you need yeast in them, like doughnuts, loaves of crusty bread, maybe some different quick breads. That's going to be the plan. To finish out the month of March, I'm just going to finish baking things that I really want to bake. With that being said I wanted to try to make a small batch of macarons, so I tried a new recipe and I think they turned out great, and I also wanted to bake them to use some leftover buttercream that I had in the fridge. I ended up making chocolate macarons with a strawberry buttercream filling and berry macarons with a blackberry buttercream. Oh last week I made my version of galaxy macarons with blackberry buttercream so I'll explain those and have pictures below. Look how yummy they look.

Here are the Galaxy Macarons

galaxy macarons
Galaxy Macarons

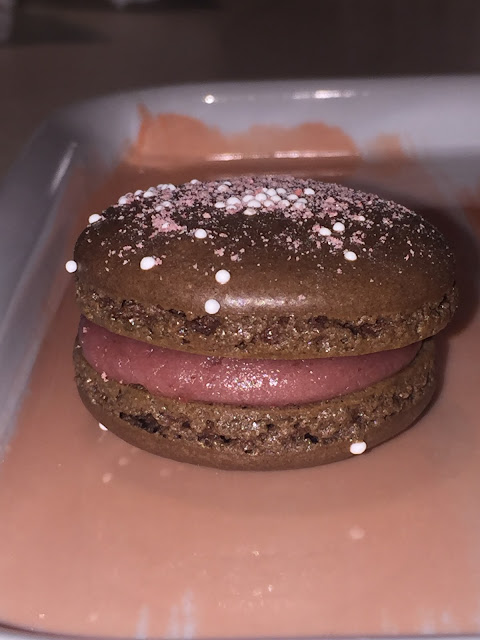
Here are the Chocolate Strawberry Macarons

chocolate strawberry macarons

Here are the Berry Macarons

A row of sweet berry macarons


For the Berry Macarons my oven was a bit hot, so the little ruffled feet spread out a little more than I would have liked. I'm not in love with the way the looked, but the texture and taste were amazing. I ended up turning the oven down five degrees and the other cookies turned out more visually pleasing to me.

This new recipe I used makes 12 macaron shells (6 sandwiched cookies)

Macaron shells (small batch)

  • 30g of almond meal
  • 55g of powdered sugar
  • 20g of granulated sugar
  • 30g of egg whites (room temp)
This is the recipe if you want more cookies (makes about 24 sandwiched cookies)

Macaron  Shells (large batch)
  • 125g of almond meal
  • 200 g of powdered sugar
  • 50 g of granulated sugar
  • 100g of egg whites (room temp)
Additional Materials
  • Gel food coloring
  • baking sheet 
  • parchment paper
  • rubber /silicon spatula
  • fine sieve
  • piping bag/ziplock bag
  • round tip
  • whisk/hand-mixer/stand-mixer

I like to have everything weighed out and already in bowls to start because I find it easier and faster when it's time to make these.

Take your powdered sugar and almond meal and run it through a sieve.


It should look like this


Now set your flour mixture aside.

Take your egg whites and pour them in a clean dry bowl and begin beating them on low for 2 minutes. The egg whites will become white and foamy. Now turn your mixture up to medium for 2 minutes, your egg whites will begin to look like sour cream. Gradually add in your granulated sugar . Now your egg whites will look a bit like shaving cream and will have formed soft peaks. Now is a good time to add in your food coloring.


Since I'm making berry macarons, I added in 2 drops neon pink and one drop red. I then beat on high for 2 minutes until stiff peaks form.


Now stop beating the egg whites and add in your flour mixture


Gently begin folding this mixture over itself while going around the bowl at the same time. You will stop when the batter can ribbon off of the spatula. Remember you do not want to over mix or undermix this batter. Literally stop when it can ribbon off your spatula like a hot lava. Also preheat your oven to 300F. My oven runs hot so I like to cook these at 295F. 

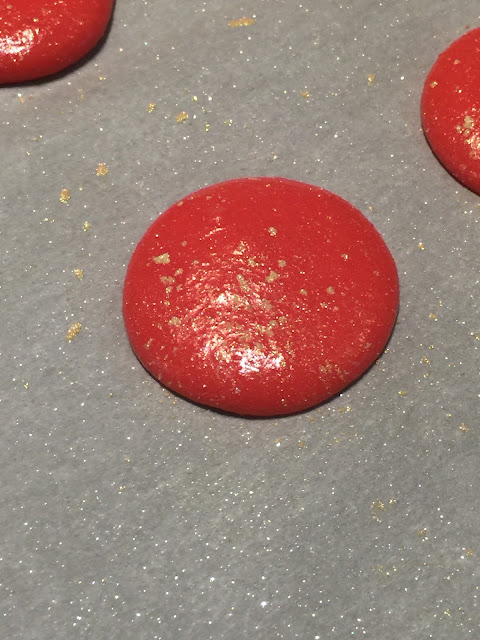
Take your batter and place it in a piping bag with a round tip attached and pipe 1.5 inch circles on a parchment lined baking sheet. Try not to pipe so close together because batter will spread when you bang the tray. I then sprinkled gold luster on top

I like adding a little gold dust


macarons

After you pipe the cookies on the tray bang it against the countertop to get air bubbles out. Now you need to leave these out for about 20-30 mins, depending on how humid it is. To test to see if these are ready to go in the oven, just lightly touch your macarons and see if they are dry to the touch (no batter sticks to your finger)

Bake at 300F for 18 minutes

For the galaxy macarons I just made the batter as normal just omitting the food coloring. I added food coloring after the dry and egg whites were already incorporated together. I then separated some of the batter into separate bowls and colored some black, navy blue, light blue,and forest green. I then placed a few spoons of each color and swirled it in a piping bag. And just pipe them on the tray. While these were drying out on the counter I added silver luster dust and mini white round sprinkles to the top
Resting galaxy macarons

For the chocolate shells just add 3-4 tablespoons of cocoa powder to your dry ingredients and sift them all together in your sieve.


Follow the instructions above, I also add brown food coloring to my egg whites


Fold in the mixture of cocoa powder, powdered sugar and almond meal


Pipe them just like the others, I added little sprinkles to the top

Chocolate Macaron Shells

Bake all of these one tray at a time 300F for 18 minutes. I like to let them cool on the tray for about 1-2 minutes, then take them off of the tray, still on the parchment paper. 

Now it's time to fill them

Use whatever you like, jam, nutella, buttercreams, ganaches. I used buttercream that I had made previous.

Simple buttercream recipe
  • 8oz of softened butter (2 sticks)
  • 11/2 cup powdered sugar (adjust to your taste) (start small you can always add more)
  • 1 teaspoon of vanilla extract
  • flavor mix in ( whatever you want) (jam, cocoa, extracts, citrus zests) ( start with a few tablespoons)
  • gel food coloring (make it whatever color you'd like)
Just blend all of the above ingredients with a mixer until smooth

Add your buttercream to a piping bag and pipe onto one cookie and sandwich with another cookie. Voila you are done. 

These taste better if you pop them in the fridge for 24-48 hours and then let them come up to room temperature before eating. (It soaks up the flavors of your filling in the shell). They taste so yummy, crunchy outside, chewy inside with a creamy filling

My nail was dyed, but these macarons were so good

chocolate-strawberry deliciousness